
Recently my eye fell upon an amazing Python tool called glances, which monitors your system in a curses layout. It's awesome and will probably be my goto for system monitoring in the future!
Installing glances on the Raspberry Pi
When starting off it's always a good idea to go trough the README & wiki of the official repo. This post will mainly guide you trough steps already described in the README but it focusses also on adding a service you can start trough systemd and enabling remote connection possibilities with nginx & port forwarding.
We're going to install it with pip since this is the easiest & most easily upgradeable way of installing glances. Installing it trough pip will make sure dependencies are automatically satisfied. There are some things we need to get in order first though:
- Python v2.7.x or a version higher than 3.3 if you're already on Python 3
- Python headers to install
psutil. Thepython-devpackage includes these
You can fetch all the packages required to set up installing from pip with this snippet:
sudo apt-get update && sudo apt-get upgrade
sudo apt-get install python-dev python-pip
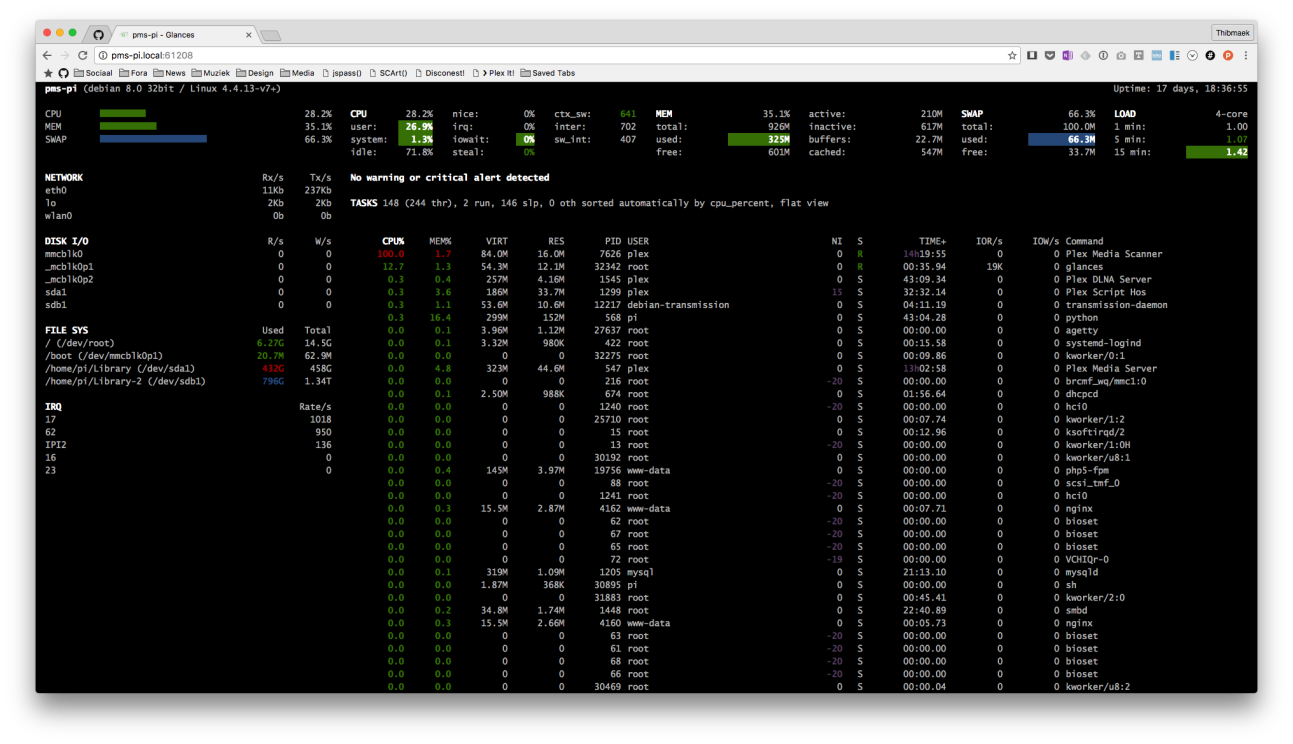
sudo pip install glances bottleWe also installed bottle alongside of glances here so we can start the web interface, which we'll use to access it remotely. Glances should now be installed and you can open its interface by running glances on your Pi or in an SSH session.
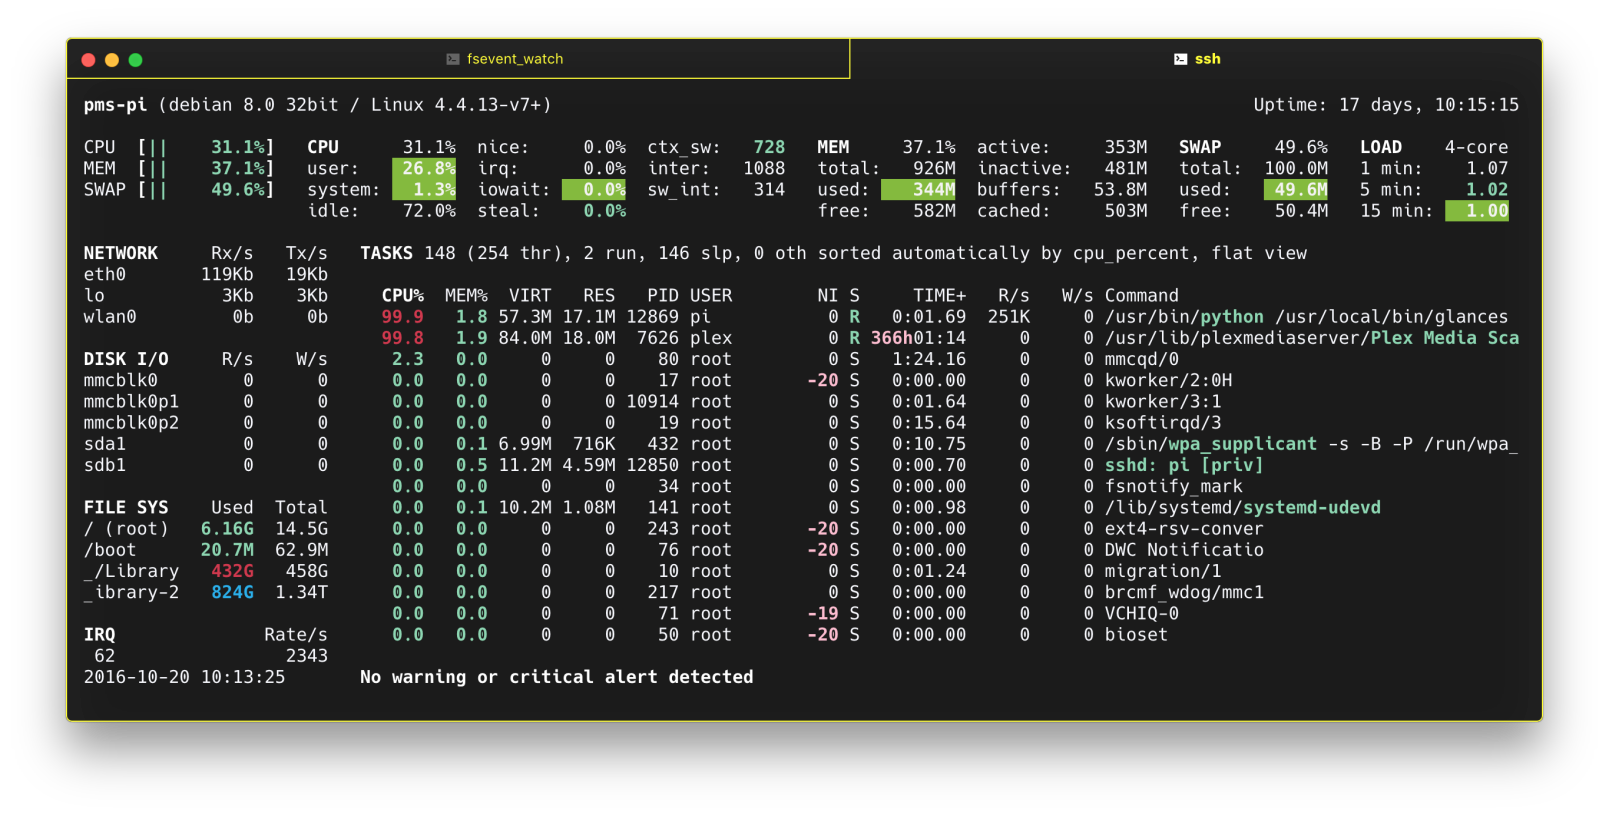
While that might be fine for occasionally checking like you did with htop/top it won't suffice for our needs. Let's hit q and move on to adding it as a service.
Running as a service with systemd
systemd is the new init system used in Raspbian Jessie (Debian 8). It forms the replacement to init.d which was included in previous versions of Raspbian/Debian. Covering init systems & comparing them is beyond the scope of this post, but for those interested there are some links at the last section of this page.
While init.d is still present in Jessie it's not encouraged to use it anymore and solely rely on systemd. Besides why would you? Creating a unit/service with systemd is much more convenient & easy to do so!
Only continue with this if you got glances up & running by running it directly from the shell.
When installing the packages from pip I also installed bottle which is a micro framework for webapps and which will allow us to connect to the glances interface in any browser over http. The way we will want our systemd service to work is to that it is automatically started on boot and we can manage it trough systemctl. Let's start with creating the file in the correct directory where systemd services are stored:
sudo nano /etc/systemd/system/glances.servicePassing the -w flag to glances will start the webserver mode on port 61208, which is exactly what we need in our case. Optionally you can create an extra service or change the -w flag by -s to start glances in server mode so that we can connect to it in another shell with glances -c <0.0.0.0>. For now we'll focus on the web server instead. Inside the nano window create these entries:
[Unit]
Description=Glances

[Service]
ExecStart=/usr/local/bin/glances -w
Restart=on-abort

[Install]
WantedBy=multi-user.target
Ctrl+x, y and enter to save the file. We've now successfully created the service to manage glances and run it in the background, but still need to enable it and start it with systemctl which manages systemd:
sudo systemctl enable glances.service
sudo systemctl start glances.service
Alright, we've now created and started the service. If you visit the ip address of your pi in a browser, followed by port 61208 while connected on the same network you should see the glances interface!
Setting up a reverse proxy in Nginx
This works great for those who want to monitor on their local network. Let's take it a step further though, and open this up so we can visit a simple url anywhere we want by using nginx's reverse proxy.
First off be sure to install all the required packages for nginx with sudo apt-get install nginx -y. The packages nginx-common and nginx-full will be installed as a requirement next to nginx itself, do not remove them!
Once nginx is is installed head over to the config directory for it, disable the default site and create a new file in sites-available:
sudo unlink /etc/nginx/sites-enabled/default
sudo nano /etc/nginx/sites-available/reverse
Add the following to the config:
server {
  listen 80;
  server_name example.dyndns.org 192.168.0.200 # change this to your dynamic url & local ip

  location / {
    if ($http_referer ~ "^https?://[^/]+/glances") {
      rewrite ^/(.*) /glances/$1 redirect;
    }
  }

  location /glances/ {
    rewrite /glances/(.*) /$1 break;
    proxy_pass http://127.0.0.1:61208/;
    proxy_set_header Host $host;
    proxy_set_header X-Real-IP $remote_addr;
    proxy_set_header X-Forwarded-For $proxy_add_x_forwarded_for;
    proxy_set_header X-Forwarded-Proto $scheme;
  }
}
Ctrl+x, y, enter to save. Now let's symlink it into our sites-enabled directory to enable it, test our configuration and reload nginx.
sudo ln -s /etc/nginx/sites-available/reverse /etc/nginx/sites-enabled/reverse

sudo nginx -t
# Output of the above line should be:
# nginx: the configuration file /etc/nginx/nginx.conf syntax is ok
# nginx: configuration file /etc/nginx/nginx.conf test is successful

sudo systemctl restart nginx
Now visiting either the ip address for your pi or the dydns hostname followed by /glances should work and everywhere you go you can take a glance at the system!